
Keeping tropical freshwater fish is not as difficult as you may think. As with any tank, the fish are reliant on the maintenance of good water quality, the correct temperature & sufficient aeration. These things can all be checked regularly once the tank is up & running so the most important thing is getting your setup right from the beginning.
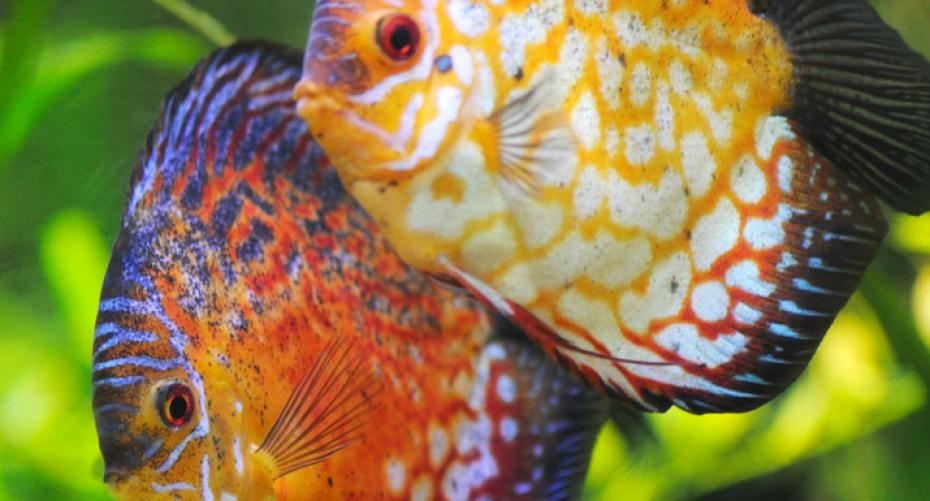
Before you think about buying fish you need to consider what size of tank you are going to have & where you are going to site it. The tank will be extremely heavy when it is full of water so it needs to be sited on a perfectly flat surface or it will crack. It is best to buy a ready made stand that will fit your tank; you may also consider getting one that is a cabinet so that you can store your fish keeping equipment within easy reach. The tank needs to be sited away from direct sunlight, which will cause temperature fluctuations & algal growth, & heat sources such as radiators. The size of the tank determines the number & the type of fish you can keep. The general rule for stocking tropical fish is 2.5cm (1”) of fish per 4.5 litres (1 gallon) of water for an immature tank of less than 6 months old rising to double this for a mature tank. Small tanks holding 45 litres / 10 gallons or less are better for small, less active fish such as neon tetras or Siamese fighting fish. A medium size tank holding 90-150 litres / 20-30 gallons is suitable for small, more active fish such as danio, dwarf catfish & angelfish. A large tank holding 180-225 litres / 40-45 gallons is good for keeping more active fish or a large selection of different fish such as mollies, swordtails or rainbow fish.
 I would advise reading around a bit first so that you can plan exactly what sort of tropical fish you can house for the size of tank you can accommodate. You also need to know whether the fish you like have similar requirements & are going to get on with each other. Once you have decided on the fish & the tank you can look at the equipment you will need & how much it costs; there is a huge range to choose from so you need to narrow it down according to the job it needs to do in your tank & how much you can afford. You will need filtration, aeration & heating equipment, lighting to show off your fish & tank decoration including substrate, rocks or bogwood & plants.
Once you have all your equipment together, setting up your aquarium is easy. First give all the equipment & the tank a good clean & rinse your gravel through several times. Place your stand in its final position, making sure it is stable, and then place your tank on the stand. Ensure that there is solid contact between the tank and the stand as uneven surfaces can break or crack your fish tank. If you have decided to use an under gravel filter place it in the empty tank & fit the lift tube(s), a small tank with a power head to run the filter will probably only need one lift tube but if you use an air pump you will probably need two. Fit your power head if you are using one & check that the tank lid will fit on when it is in place, you may need to cut the airlift tube down to size. If you are using an air pump, connect your air stone to the pump using a length of airline fed through the lift tube top and lower the air stone down the airlift tube. The air pump will ideally need to be sited above the water level, because water can drain back out through the air tube if the power goes off, damaging the pump & possibly reaching the electricity supply. You can put a check valve in the air line to help prevent this.
Spread the gravel out over the filter so that you have a relatively even, but sloping layer. You want the lowest point in the gravel to be near the front of the tank so detritus will collect there making it easier to clean it out. If you have a secondary filter as well as the under gravel filter put that in place now. Position your heater at the back of the tank at an angle so that it is heating the water at the bottom of the tank but you are still able to see the indicator so you can see it is on. Attach an adhesive thermometer near the top of the tank on one end where you can check the temperature easily.
 Now add your tank decorations so that you can easily change them around before adding water. Make sure they are securely in place & use them to hide your equipment. Don’t overfill the tank, leave space for the fish to be seen & try to make it look as natural as possible with taller objects at the back. Finally place your lid on the tank and cut out any sections to accommodate power cords, heaters, filters, and air lines. You are now ready to add some water! At this stage the water does not need any pre-treating because there are no fish, pour it over a rock or place a bowl in the tank & pour into that to avoid disturbing the gravel. If you are adding plants it is best to half fill the tank then securely bury your plant roots before filling to an inch or two from the top. Once the tank is full, let it sit for an hour or so, to saturate your air stones and to equalize the heater temperature, then turn everything on. Leave the tank running for a day or two before getting any fish, this allows the temperature to stabilise & ensures that nothing leaks and that all of your equipment is working properly.
 The early weeks of new fish tank are the most crucial because the biological filtration needs time to establish itself. This is a community of bacteria which will change harmful fish waste from ammonia to nitrite then to less harmful nitrate. To start this process off you need to introduce a small number of the hardiest fish from your list of ‘must haves’. The number depends on the size of your tank, perhaps two or three small or one medium sized fish in a small tank. When you bring them home you need to float their closed bag in the tank for about 15 minutes, then open the bag and add the same amount of tank water & leave for another 15 minutes. Then net each fish out & add to the tank, it is better to carry this out with the tank lights out to reduce the stress on the fish. Every couple of days, do a 10-15% water change to reduce the build up of harmful waste, you will need to treat the water that you are adding to remove the chlorine which would be harmful to the biological filter. After about a week test your water, at this point it should have high ammonia and maybe a trace of nitrite. Test again regularly, after about six to eight weeks, your ammonia and nitrite should have dropped to trace levels and you can add more fish. At this stage you still need to add fish a few at a time to prevent the filter becoming over loaded. If levels of both ammonia & nitrite have not dropped then you need to keep on with small regular water changes & try to identify why the tank has not settled down. Possible causes include too many fish, not pre-treating the water you add, over feeding & poor filtration.
All the hard work has now been done; you just need to spend a little time on regular maintenance. Feed your fish little & often, 2-3 times a day, & check them over for signs of disease. Do a 10-15% water change each week, check your filters & clean the glass at the same time. Check your equipment at least once a month to make sure everything is running smoothly. It is a good idea to have a backup thermostatic heater for emergencies & a small tank for treating diseased fish or using as a nursery!
